
Integrate Address Validation to Your Unbounce Form
Screenshots
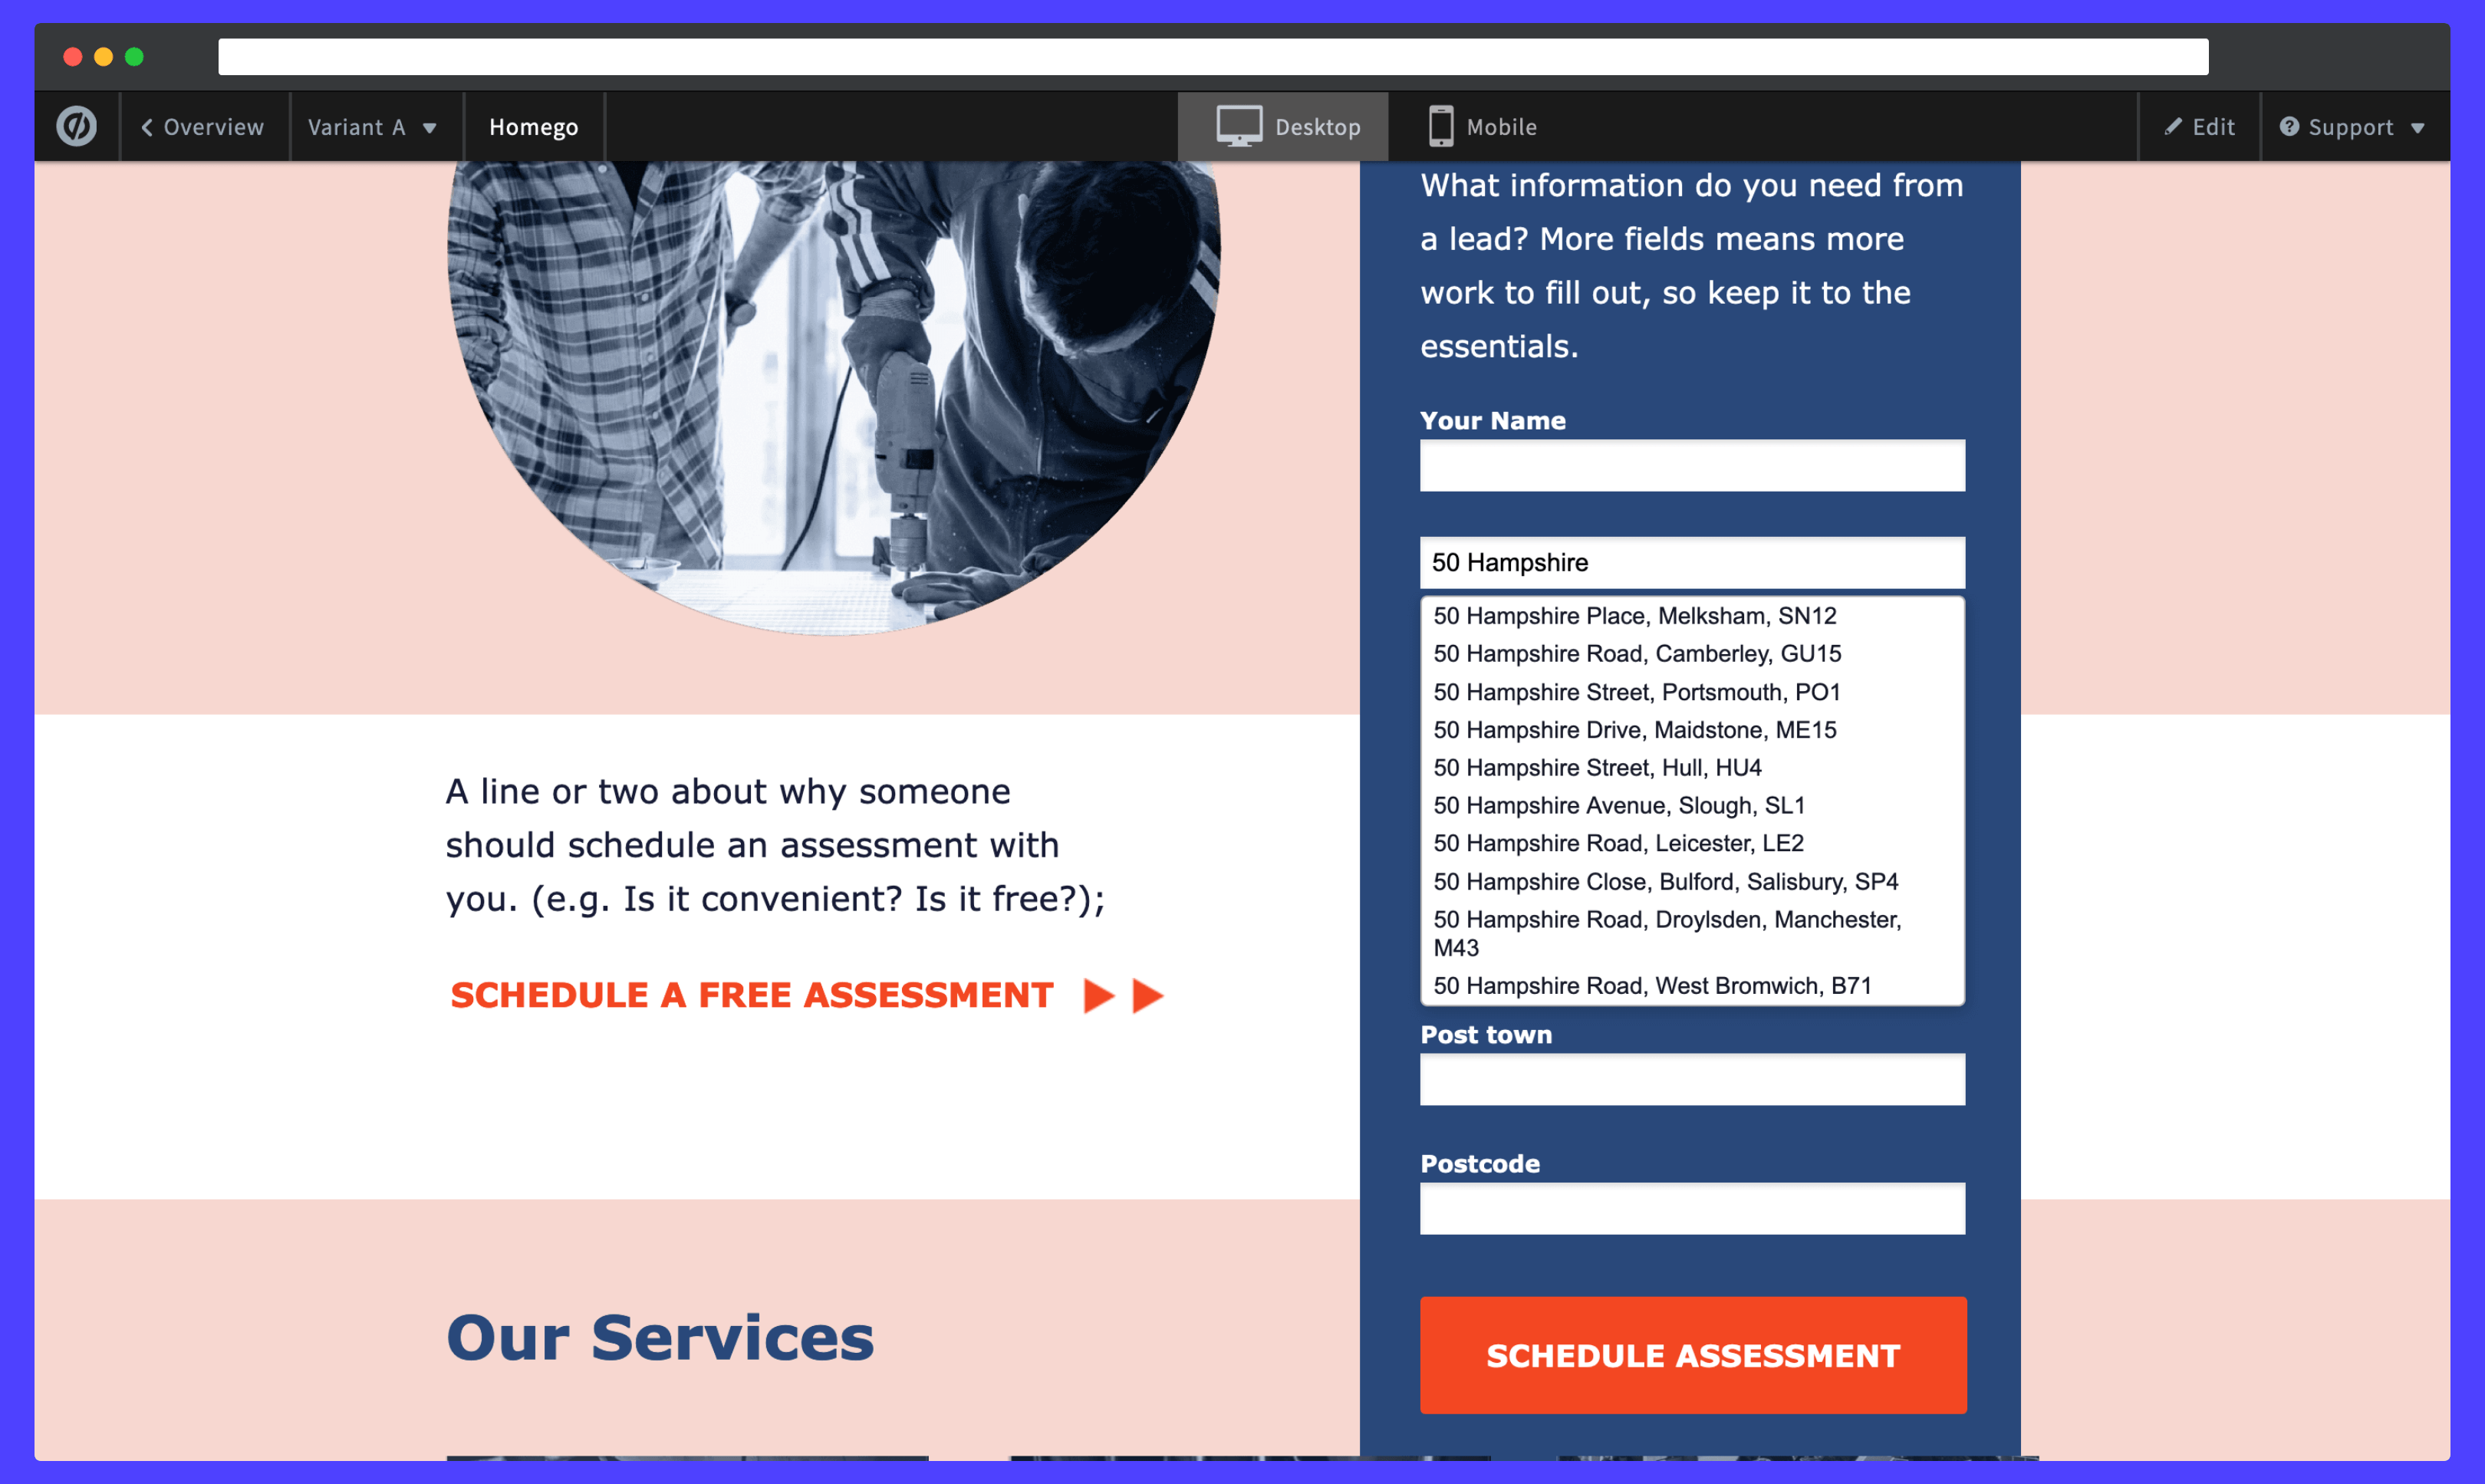
Address Finder
Postcode Lookup

Create Form Fields
This integration works by inserting scripts and stylesheets into the Unbounce Builder page.
If you need support, you can either reach out to us on our support page or drop by our developer chat page.
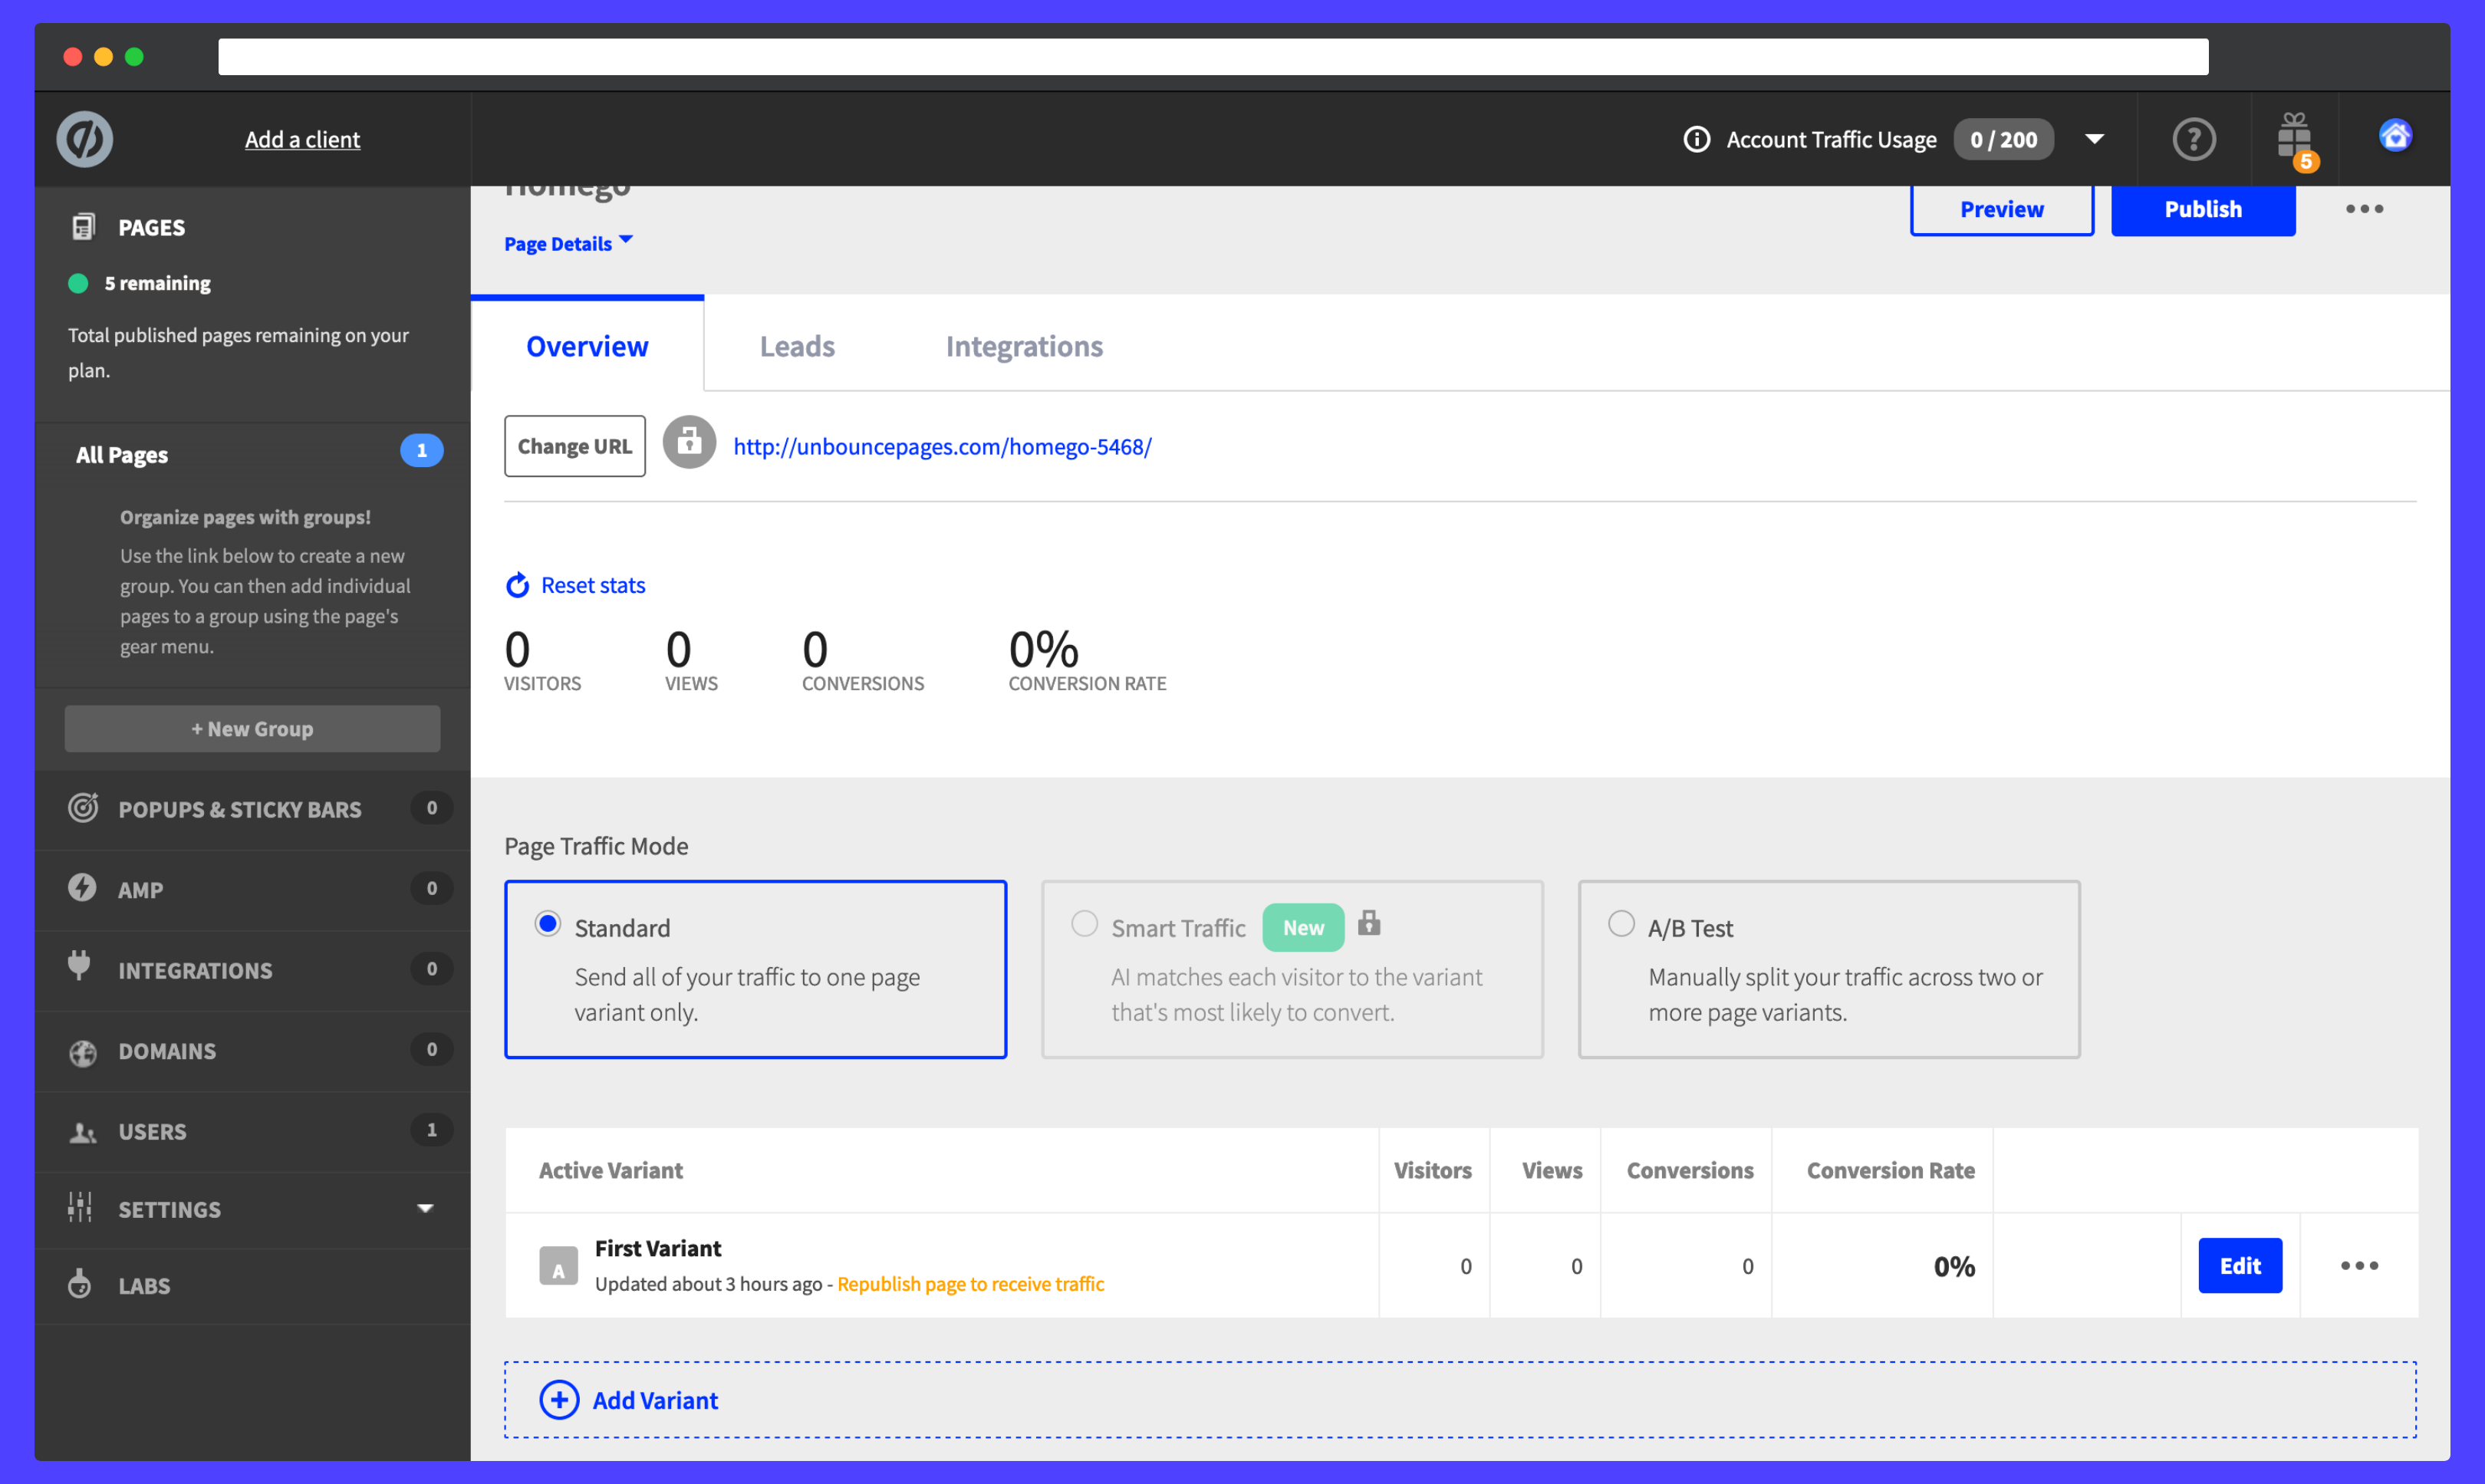
Access Dashboard
From the Unbounce dashboard, click on your page. On the Overview tab, scroll down the page to the Active Variant panel and click on the blue Edit button.
Create Address Fields
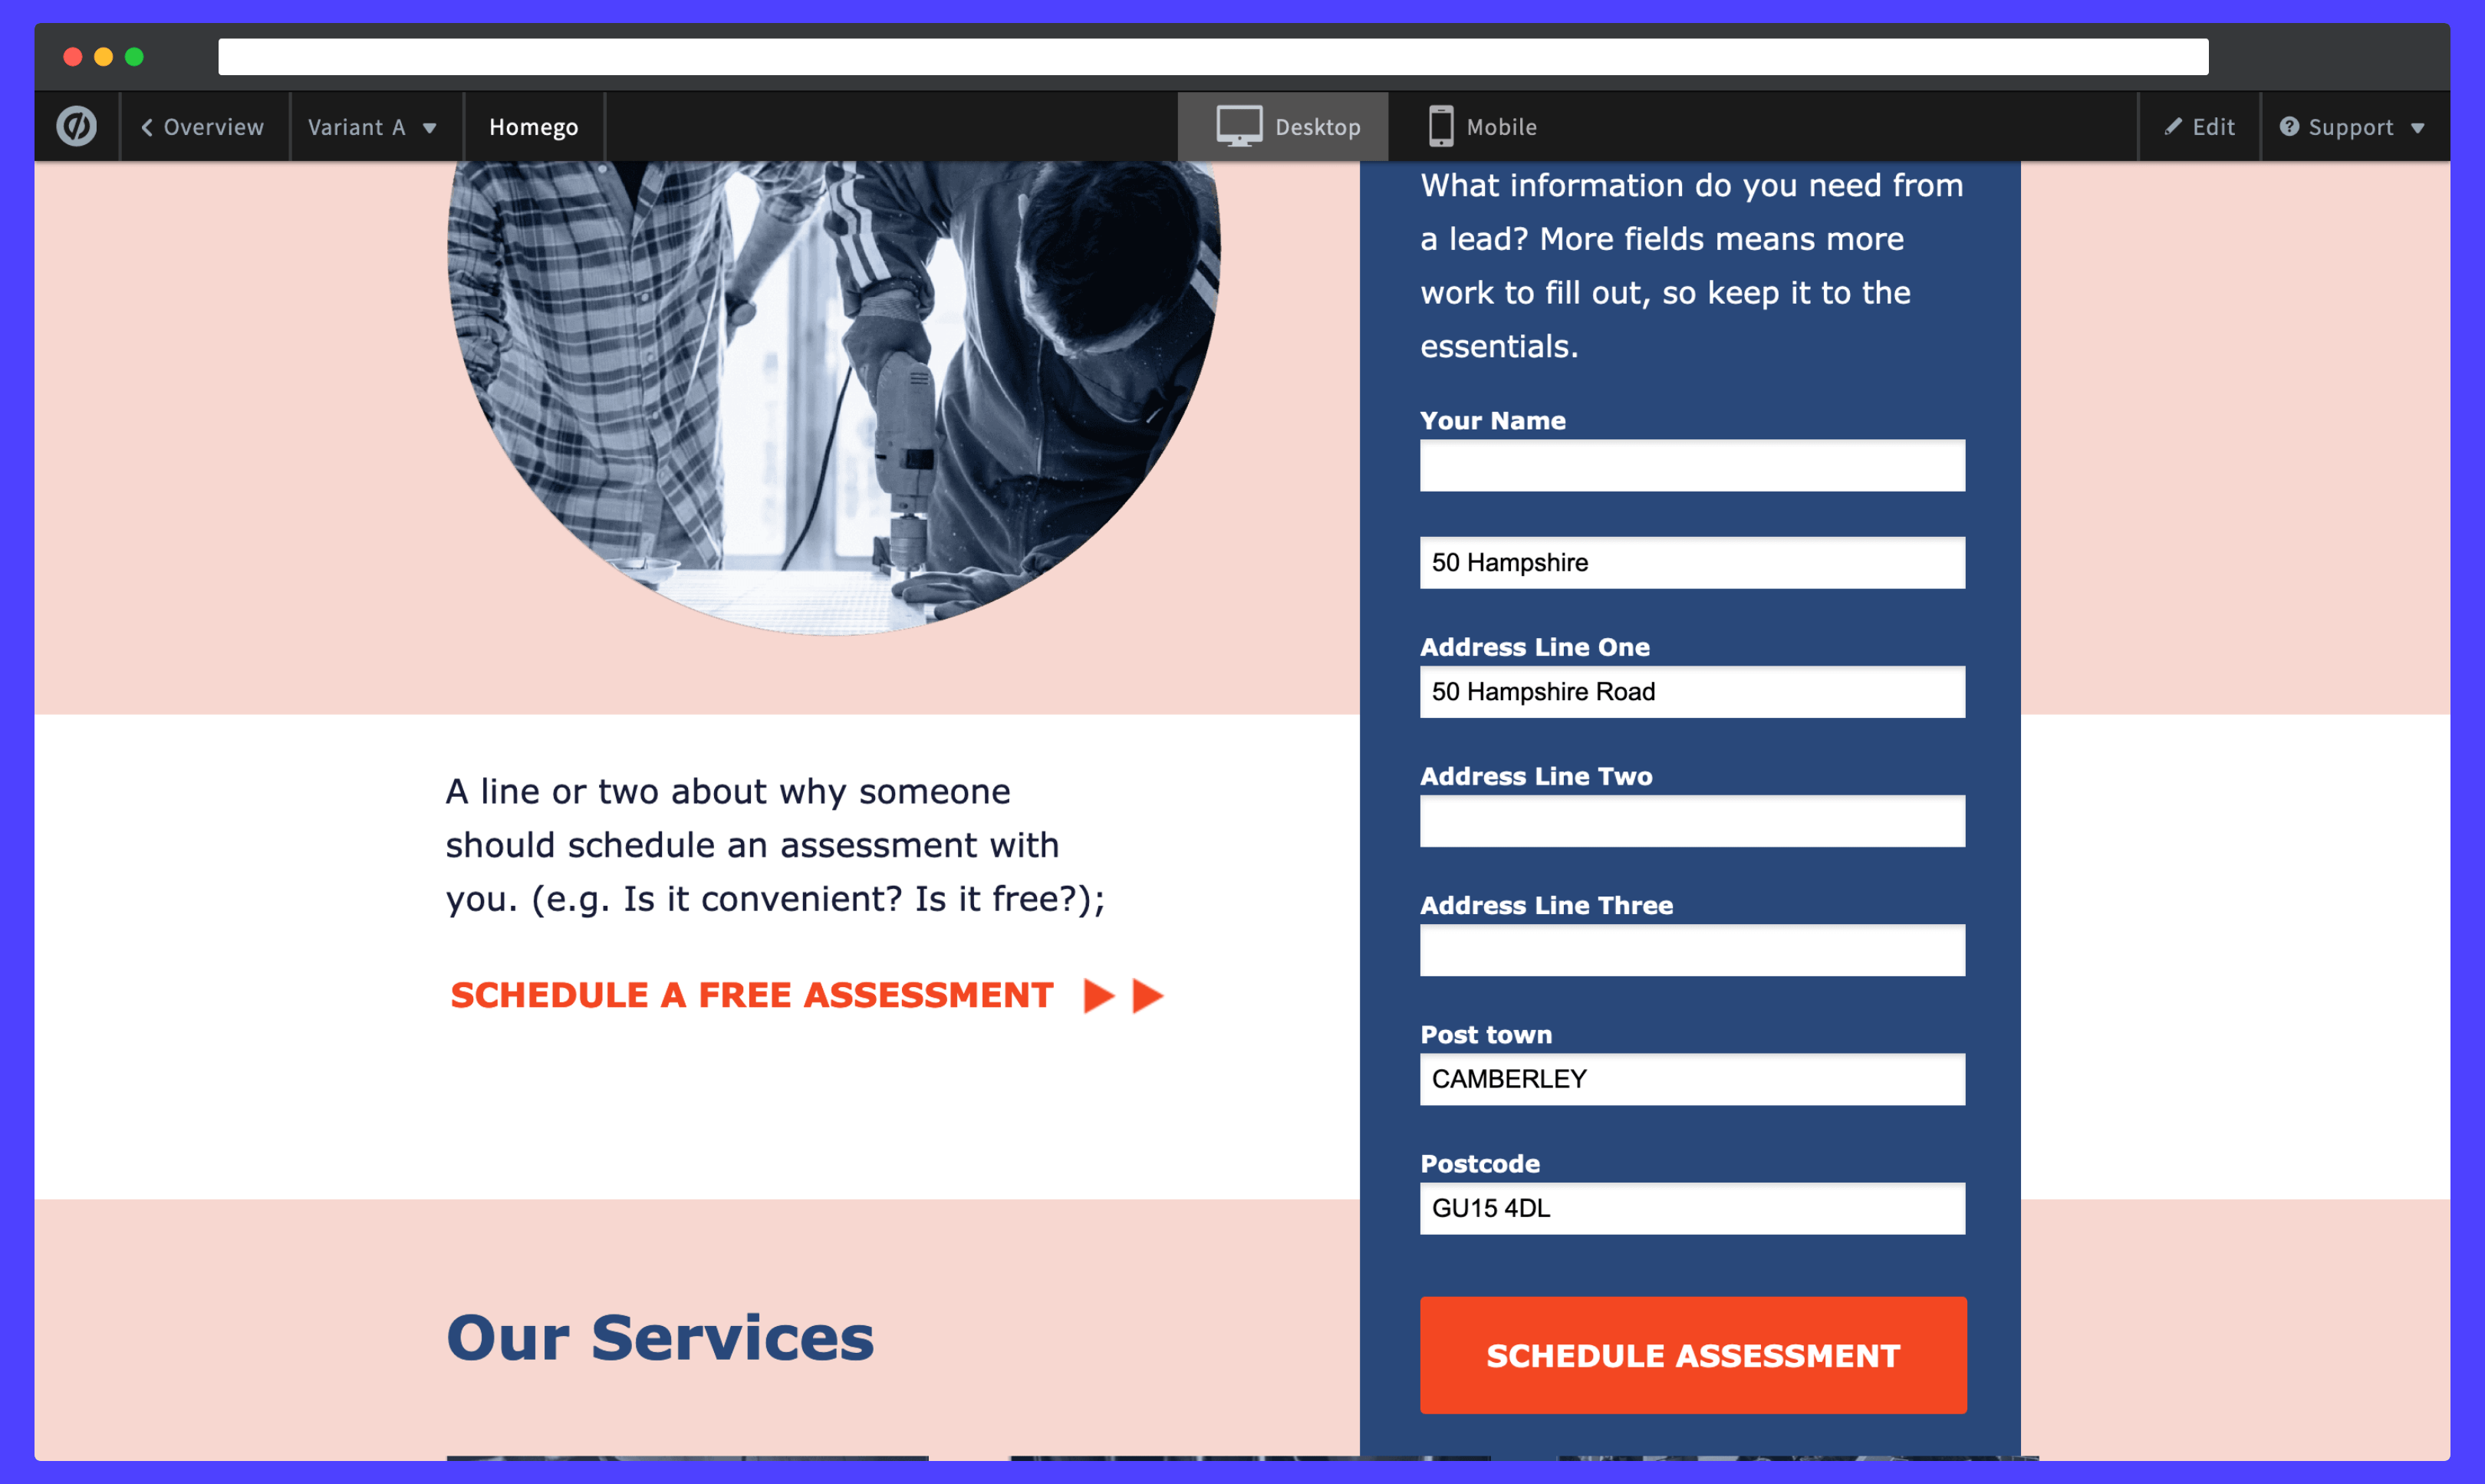
Next click on the address form. You will be directed to a modal where you can start adding address input fields to your form. A basic address form to capture a correct UK address requires the following fields:
- Address line one
- Address line two
- Address line three
- Post town
- Postcode
You can optionally include additional fields, which are documented in our PAF data documentation.
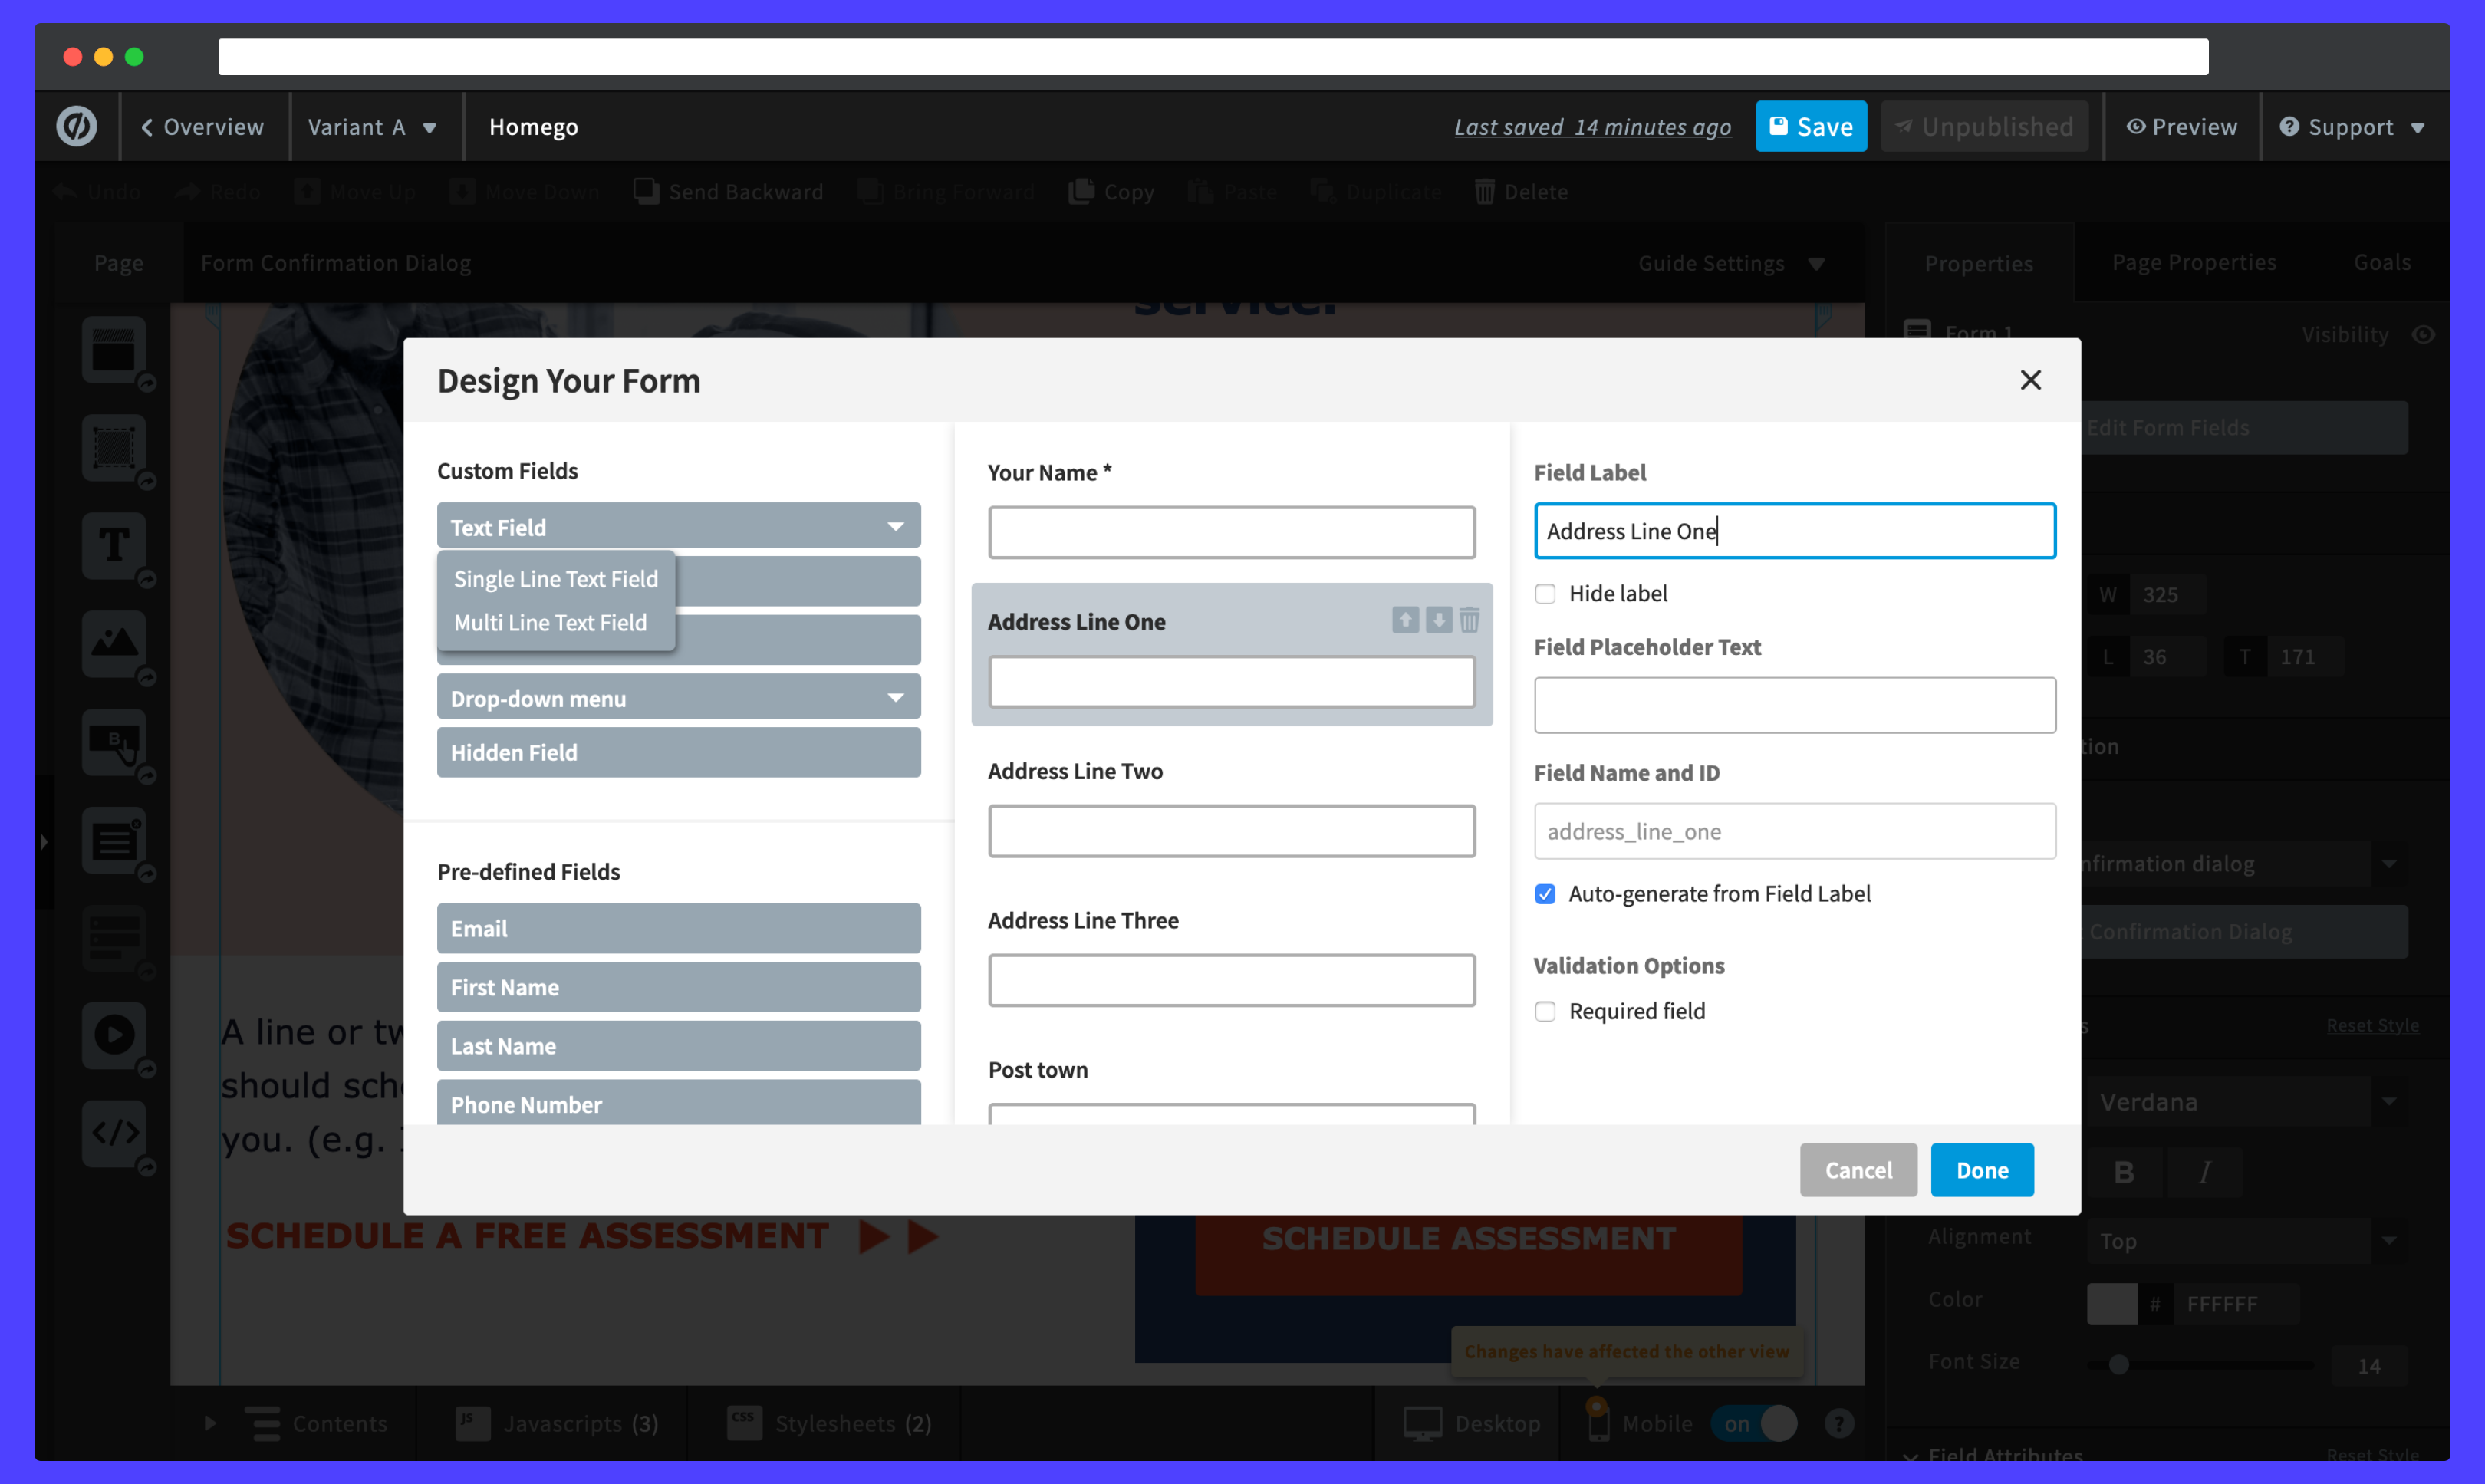
Be sure to create an input label to search for an address. Should you wish to hide the text, you can click on the Hide label checkbox. When selecting a label, you can alter its position in the form by clicking on the up and down arrows to the right of the panel.
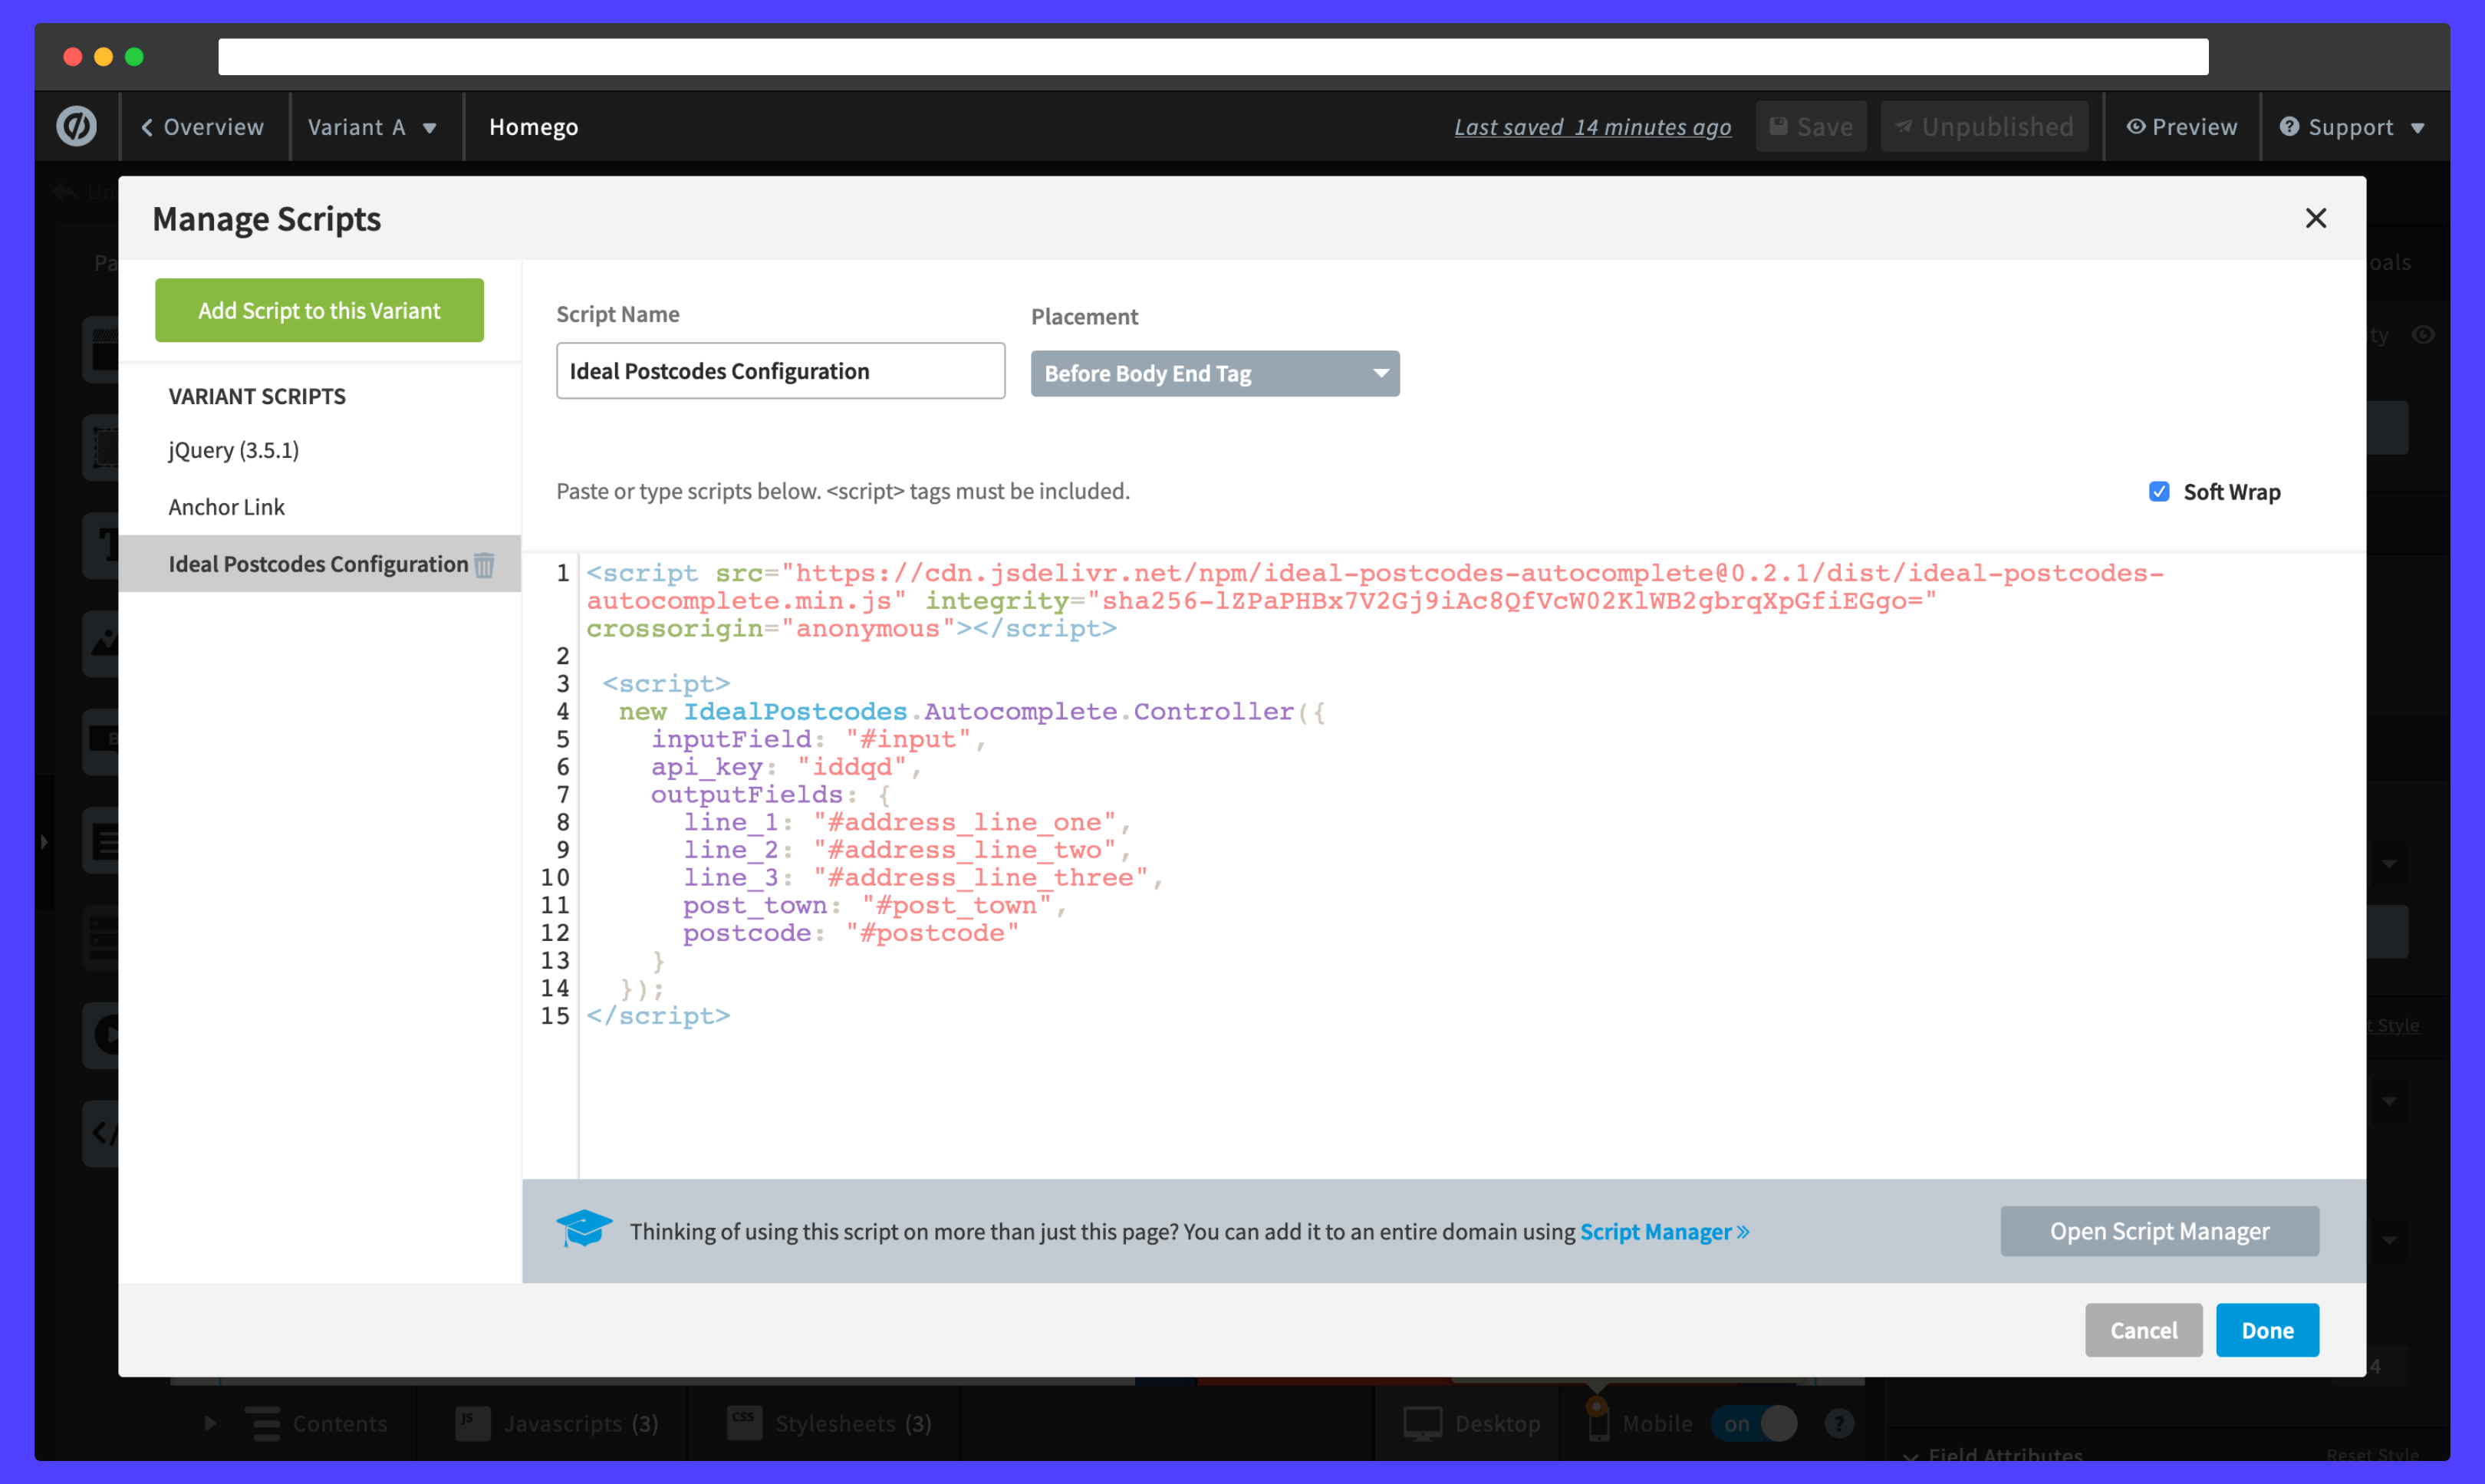
Initialise Address Finder
Navigate to the bottom of the Unbounce Builder page.
Click on the JavaScripts tab, followed by Add New JavaScript. Give the script a name and paste in the following scripts:
<script src="https://cdn.jsdelivr.net/npm/@ideal-postcodes/address-finder-bundled@4">
</script>

<script>
  document.addEventListener("DOMContentLoaded", function() {
    IdealPostcodes.AddressFinder.setup({
      apiKey: "YOUR API KEY",
      inputField: "#input",
      outputFields: {
        line_1: "#address_line_one",
        line_2: "#address_line_two",
        line_3: "#address_line_three",
        post_town: "#post_town",
        postcode: "#postcode"
      }
    });
  });
</script>
The values for the address lines correspond to the names set when creating the input fields.
Make sure you update the value for the apiKey with your own API Key. Your API Key typically begins with ak_.
Click on Done and remember to also save any progress.
Initialise Postcode Lookup
Create a new Custom HTML and place it above your first address field. This will create the postcode search field, search button and address dropdown for the plugin. Paste the code below

<div>
<!-- Postcode search field will appear below -->
  <div>
    <input
      type="text"
      placeholder="Lookup your postcode"
      id="idpc_input"
    />
  </div>

  <br>

  <!-- Search button will appear below -->
  <div>
    <input
      type="button"
      id="idpc_button"
      value="Lookup Postcode"
    />
  </div>

  <br>

  <!-- Address dropdown field will appear below -->
  <div id="idpc_dropdown"></div>
  <!-- Any error messages will appear here -->
  <div id="idpc"></div>
</div>
Navigate to the bottom of the Unbounce Builder page.
Click on the JavaScripts tab, followed by Add New JavaScript. Give the script a name and paste in the following scripts:
<script src="https://cdn.jsdelivr.net/npm/@ideal-postcodes/postcode-lookup-bundled@2">
</script>

<script>
  document.addEventListener("DOMContentLoaded", function () {
    IdealPostcodes.PostcodeLookup.watch({
      apiKey: "ak_test",
      context: "#idpc",
      outputFields: {
        line_1: "#street_line_one",
        line_2: "#street_line_two",
        post_town: "#city",
        county: "#state",
        postcode: "#zip_code"
      },
      button: "#idpc_button",
      input: "#idpc_input",
      selectContainer: "#idpc_dropdown"
    });
  });
</script>
The values for the address lines correspond to the names set when creating the input fields.
Make sure you update the value for the apiKey with your own API Key. Your API Key typically begins with ak_.

Click on Done and remember to also save any progress.
Optional: Customise the Autocomplete Script
If you wish to add an additional field, include the parameter name from our documentation. For instance, adding a county field to your script will look like:
  outputFields: {
    line_1: "#address_line_one",
    line_2: "#address_line_two",
    line_3: "#address_line_three",
    post_town: "#post_town",
    county: "#county",
    postcode: "#postcode"
  }
Configuration
See our Address Finder Plugin Documentation if you wish to customise Address Finder.
See our Postcode Lookup Plugin Documentation if you wish to customise Postcode Lookup.